Free Experiments
-
Posted: February 24, 2018Categories: Biology
 Read more »
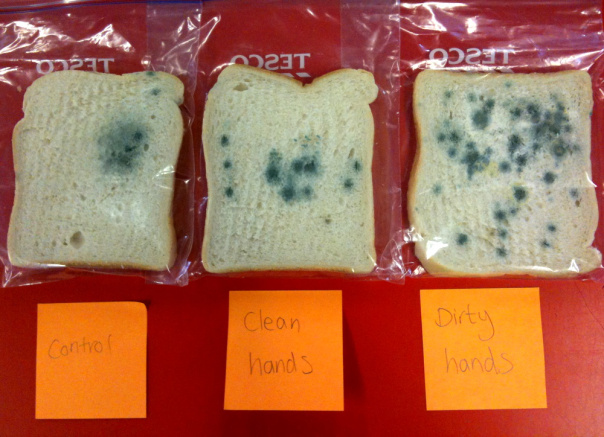
The Mouldy Bread Experiment
Learning Objectives:
- Students will develop and/or refine their skills in designing and conducting experiments.
- Students will understand the factors that promote and prevent the growth of mold on bread.
Equipment required (per student or pair of students):
- 2 slices of bread each cut into halves.
- 4 small ziplock bags
- 4 sticky labels and pen
- Access to water, a fridge and perhaps a toaster (optional)
Some moldy bread in a sealed bag for demonstration purposes.
Procedure:
Show the mouldy bread to the students to prompt a discussion. (You could give it a little backstory, e.g. ‘I
-
Posted: February 18, 2018Categories: SpaceRead more »
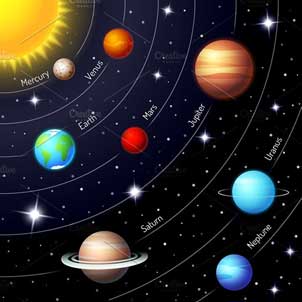
Create a human sized scale model of the solar system with your students.
Learning Objectives:
- For students to develop an understanding of the positions of the planets in the solar system, both relative to each other, and also their position and distance from the sun.
- For students to gain a practical meaning of the words ‘rotation’ and ‘revolution’ and how those words apply in the context of the movement of planets.
You Need:
-
A large open space, such as a park or football field
-
A long measuring tape (such as one used to mark out a sporting field).
-
Possibly also
-
Posted: February 18, 2018Categories: Chemistry
 Read more »
If you thought vinegar and bicarb were only good for making messy, oozy volcanoes, think again! Turn an empty cream container into an exciting, explosive rocket with this classic acid/base reaction.
Suitable for ages 13 +, best used as a demonstration because of the speed and danger of the projectile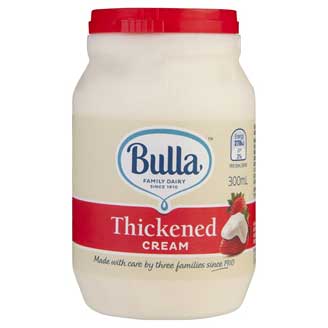
You Need:
- ¼ cup of vinegar
- 600ml empty, clean cream container
- 1 tablespoon of bicarb powder
What to do:
- Add approximately ¼ cup of vinegar (acid) to a 600ml empty, clean cream container.
- Then, add one heaped tablespoon of bicarb (base).
- Quickly push the cream lid on, and point the container away
-
Posted: July 26, 2017Categories: Biology
 Read more »
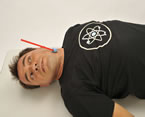
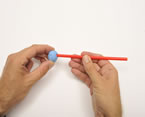
This DIY 'heart rate monitor' will open your eyes to the amazing muscle that keeps you alive and kicking.
 Suitable for kids aged 5+ with parental supervision.You Need:
- Drinking straw
- Lump of putty, plasticine or blu-tac - that's it!
What to do:- Poke the straw into the putty. Okay, so it looks nothing like an expensive ECG monitor but wait till you see what this thing can do!
- Lay on your back and find the pulse in your neck. Lay the putty on top of this spot so that the tip of the straw is just above your eye. Now watch what happens... it's a little freaky.

-
Posted: July 26, 2017Categories: Plants
 Read more »
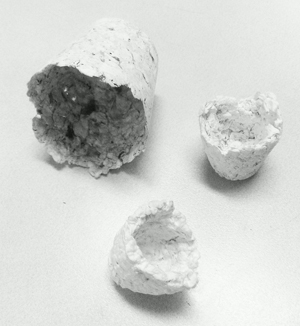
Recycled Seedling Paper Pots
Its easy to forget that making paper consumes trees and energy. These recycled paper-pots are not only fun to make, but they give new life to old catalogues and newspapers - reducing waste and helping the earth Raise a seed in your new eco-pot, then, when its time, plant the seedling pot and all in the garden no need to worry because the pots biodegradable and will break down quickly in the soil.
Suitable for kids aged 5+ with parental supervisionCAUTIONThis experiment requires the use of hot water.You Need:- Cup, yoghurt container or bowl to mould your pot
- Newspaper, or other scrap, used un-wanted paper
- Large bowl or container
-
Posted: July 26, 2017Categories: Plants
 Read more »
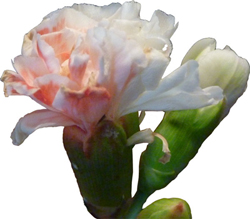
Colour Change Carnations
See how water is absorbed into a plant by changing carnations cool colours.
Suitable for kids aged 4+ with parental supervision. Only adults should cut the flowers.You Need:- 6 x white carnation
- 6 x cups
- Food colouring (red, yellow, blue and green)
- Knife (to be used only by an adult)
- Water
What to do:- Fill each cup half full with water.
- Add about 30 drops of colouring into four different cups. One cup with blue colouring, another red, one yellow and one green. The more food colouring the better.
- Before placing any of the flowers in coloured
-
Posted: July 26, 2017Categories: Light & Colour
 Read more »
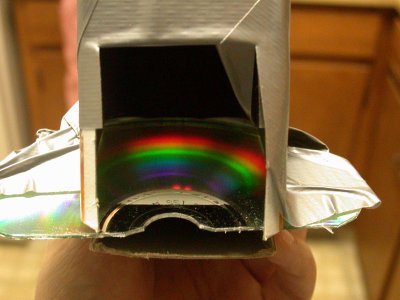
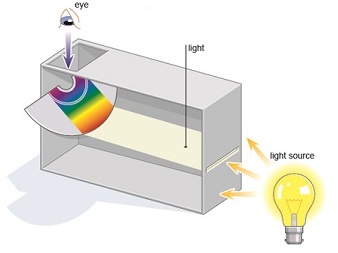
Homemade Spectrometer
Turns out theres a lot more to white light than meets the eye. Here's a simple spectrometer you can build yourself, using just a spare CD, an empty cereal box and a pair of scissors.
 Suitable for kids aged 11 +You Need:
- Cereal box
- Compact Disk
- Utility knife/Scissor
- Protractor
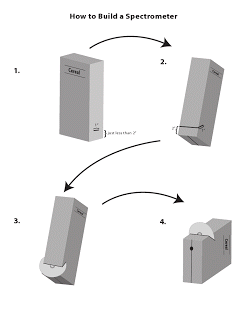 What to do:
- Cut a 1" slit on the side of the cereal box just below the nutrition information.
- Cut a slit
-
Posted: July 26, 2017Categories: Light & Colour
 Read more »
Split light without a prism
Want to make a rainbow but dont have a prism? Heres a simple way to make one anytime the sun is shining. Youll be beaming from ear-to-ear.
Suitable for kids aged 5 +You Need:- Shallow dish
- White wall (or large piece of white paper/card)
- Small mirror
- Water
- Sunlight (the stronger the better)
What to do:- Pour some water into the shallow dish.
- Place the small mirror in the water and prop it at an angle against the side of the dish.
- Put the dish near a sunny window and position the mirror so that sunlight bounces
-
Posted: July 26, 2017Categories: Light & Colour
 Read more »
Wax Photometer
Make your own translucent photometer out of paraffin wax that can read light and colour.
Suitable for kids aged 6+ with parental supervisionCAUTIONIf you are unable to source your own paraffin wax blocks you will need to make your own. Wax blocks must strictly be prepared by an adult as they involve melting wax and pouring the hot wax into a mould.You Need:- Two small paraffin wax blocks (approx. 8 x 5 x 2cm). If you cant source your own from a supermarket or candle supply centre then you will have to make your own. Instructions in the What to do section.
- Aluminium foil
- Scissors
- Masking tape
- Torch (optional)
- Sheets of coloured
-
Posted: July 26, 2017Categories: Light & Colour
 Read more »
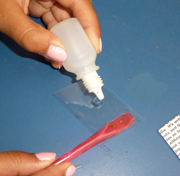
Water Drop Magnifier
Its so simple to make your own mini magnifying glass. Heres how.
Suitable for kids aged 4+You Need:- Small square of fairly-rigid transparent plastic (You can cut-up a clear acetate sheet, or a transparency available from art and craft stores and/or office supply stores. A piece of plastic from a shirt box or the like would also work)
- Half a straw
- Stapler
- Drop of water
- Eye dropper bottle or pipette (optional)
What to do:- Staple the straw to the edge of
Recent Posts
Showcased Product
Energy Stick

Completely safe to touch and handle, simply complete the circuit by touching both electrodes at the end of the stick simultaneously.
